

When it comes to moving a fridge freezer, success is all in the prep work. The heavy lifting is the final step, but the real effort happens well before moving day. Your primary focus should be on getting the unit empty, clean, and fully defrosted at least 24-48 hours before you plan to move it. This simple timeline is your best defence against messy leaks and the dreaded post-move mould.
Let’s walk through exactly what you need to do to get your appliance ready for a safe and smooth journey.
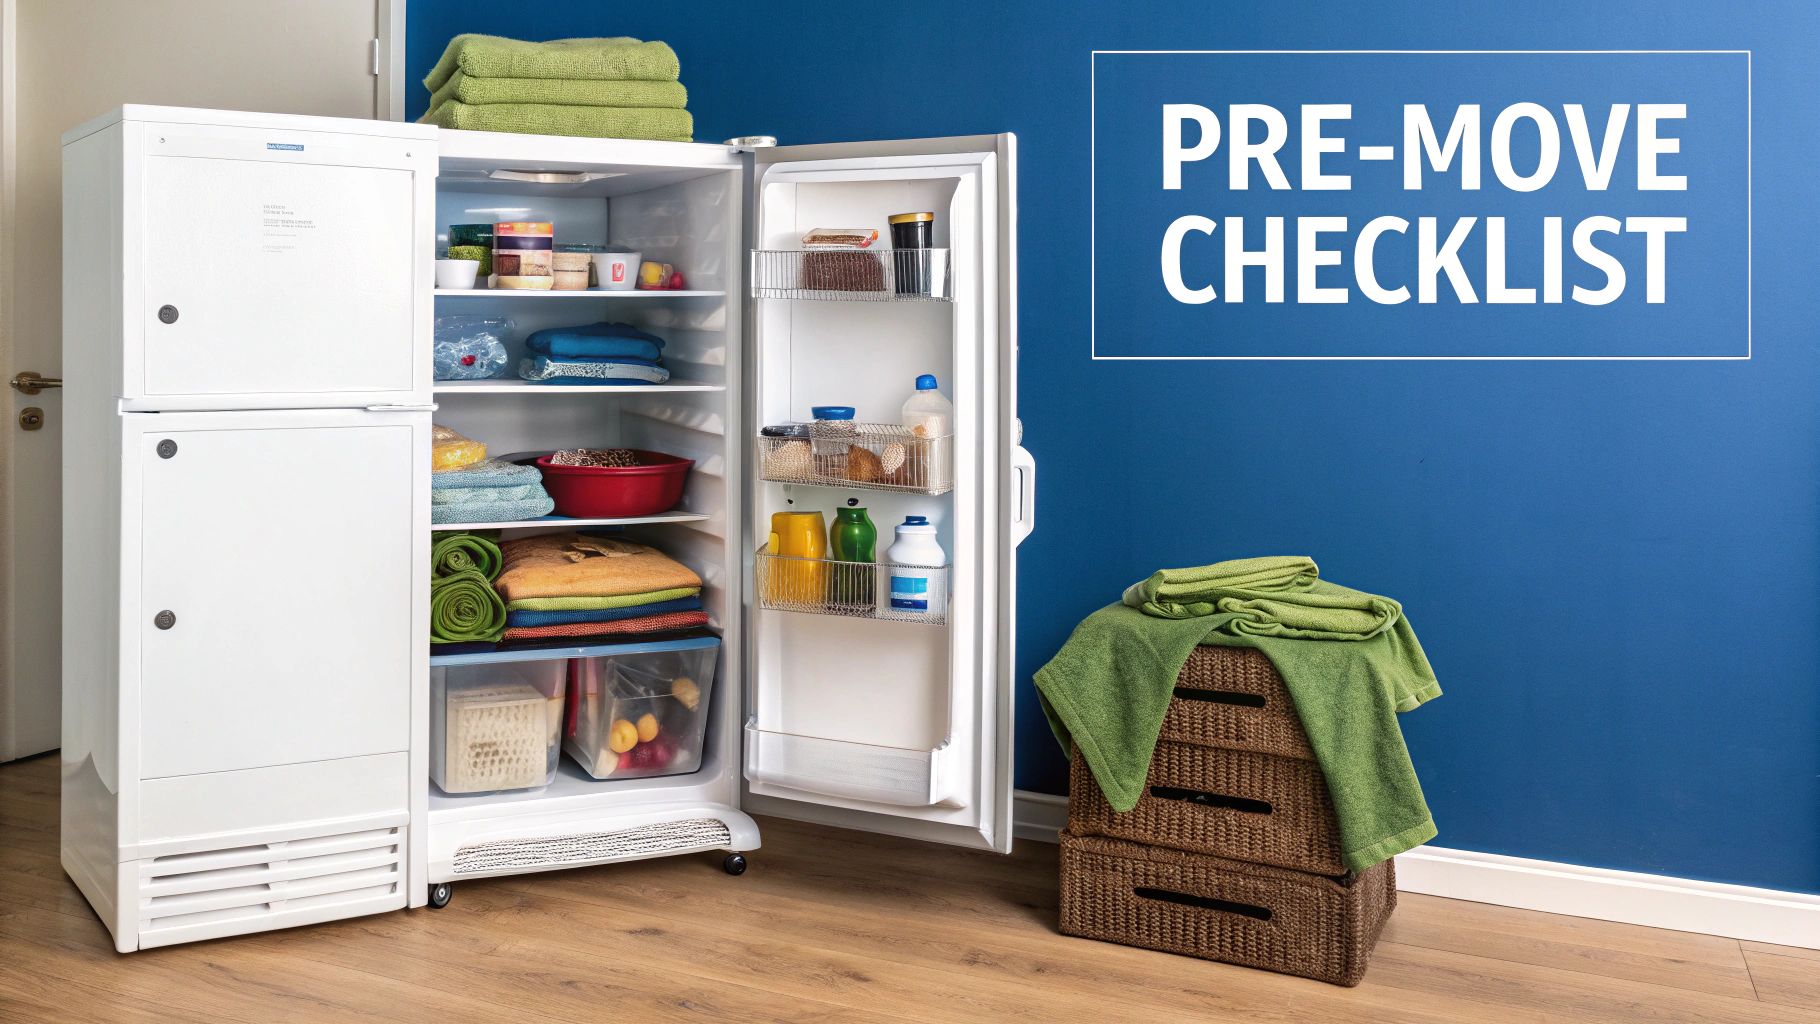
Your Pre-Move Preparation Checklist
First things first, you need to completely empty the appliance. And I don’t just mean the food. Every single shelf, drawer, and loose component needs to come out. This not only makes the fridge freezer significantly lighter but also stops those parts from rattling around and causing damage during the move.
Once it's bare, give the interior a proper clean. A simple solution of bicarbonate of soda and warm water works wonders. Wiping down every surface is a non-negotiable step, especially if you’re putting the unit into storage. It's the best way to prevent mould from taking hold and stop unpleasant odours from developing.
The All-Important Defrosting Timeline
If there’s one step people get wrong, it’s defrosting. It always takes longer than you think. You absolutely must unplug your fridge freezer at least 24 to 48 hours before moving day. This gives all that built-up ice in the freezer enough time to melt away completely.
Trying to move an appliance that's still frosty inside is asking for trouble. As it thaws on the back of the lorry, meltwater can leak everywhere. This creates a slippery, dangerous mess for the movers and can damage the vehicle, your other boxes, and even the fridge's own electrical parts.
To make this process a bit easier, I've put together a simple timeline to follow. It's a practical countdown that helps ensure your appliance is fully prepped and ready to go when the movers arrive.
Fridge Freezer Pre-Move Timeline
| Timeframe Before Move | Action Required | Key Objective |
|---|---|---|
| 1 Week | Start running down your food supplies. Plan meals to use up frozen and perishable items. | Minimise food waste and avoid having to transport or throw away food on moving day. |
| 48 Hours | Unplug the appliance from the mains. Place old towels at the base to catch meltwater. | Begin the defrosting process with plenty of time for all ice to melt naturally. |
| 24 Hours | Remove all shelves and drawers. Give the entire interior a thorough clean and allow to dry. | Prevent mould and odours. Lighten the appliance and secure loose parts for transit. |
| Moving Day | Do a final check for any remaining moisture. Secure the doors and power cord. | Ensure the unit is completely dry and safe for transport. |
This timeline isn't just a suggestion; it’s a proven method to avoid last-minute panic and potential damage.
Pro Tip: During the defrost, lay down a few old towels or absorbent sheets inside and at the base of the fridge freezer. They’ll soak up the meltwater and save your floors from any damage. Just remember to check on them and swap them out as they get saturated.
Gathering Your Essential Equipment
With the appliance clean and defrosting, it's time to get your moving gear in order. Having the right tools on hand will make the entire process safer and far more efficient. Don't leave this until the last minute.
Here’s what your toolkit should look like:
- A Heavy-Duty Appliance Dolly: This is a must-have. It’s not your standard hand truck; an appliance dolly is taller, sturdier, and has straps to hold the fridge freezer securely in place. It’s the single most important bit of kit for moving a heavy appliance without injury or damage.
- Durable Moving Blankets: These thick, padded blankets are your best friend for protecting the appliance's finish from scratches and dents. They also do a great job of protecting your walls and door frames as you manoeuvre it out of the house.
- Strong Packing Tape or Bungee Cords: You’ll need these to wrap the blankets tightly around the unit. They’re also perfect for keeping the doors securely shut during transit. Just be sure to use a tape that won't leave a sticky, hard-to-remove residue.
Getting this preparation phase right is foundational. And you're not alone in this task; in the UK, the production of refrigerators and freezers recently hit 3.2 million units, marking an 11% annual rise often tied to house moves. This shows just how many people are tackling this exact job, particularly in places like Bristol, Leeds, and Slough, where smart solutions like drive-up storage are becoming essential. For a deeper look, you can explore more on the UK's appliance market trends.
How to Secure Your Fridge Freezer for Transit
Once your fridge freezer is clean, dry, and thoroughly defrosted, you're ready for the most hands-on part of the job: getting it ready for the actual move. Properly securing the appliance is about more than just preventing a few dings and scratches. It’s a crucial safety step that protects the unit itself, your home, and anyone lending a hand. A fridge door swinging open unexpectedly during a lift can cause a serious injury or take a chunk out of a wall in a heartbeat.
The objective here is to transform your appliance from a collection of moving parts into one solid, stable unit. That means thinking about everything—the doors, the shelves inside, the power cable, and even the delicate cooling elements on the back.
Securing Doors and Internal Components
First things first, let’s immobilise anything that could shift or swing open. The doors are the biggest culprit. The best way to keep them shut is with strong bungee cords wrapped tightly around the main body of the unit. If you don't have those, low-tack painter's tape stretched across the door seals will do the trick without leaving a mess. Whatever you do, don't use standard packing tape—it often leaves behind a gummy, stubborn residue that's a nightmare to clean off without damaging the paintwork.
Just as important is what’s going on inside. I’ve seen people try to move fridges with the shelves and drawers still in, and it rarely ends well. Even if they seem secure, the jolts and vibrations from being moved are more than enough to make them dislodge, crack, or even shatter.
- Remove All Shelves and Drawers: Take out every last shelf, drawer, and loose fitting from both the fridge and freezer sections.
- Pack Them Separately: Wrap each part individually in bubble wrap or packing paper. Box them up and label the box clearly. It not only keeps them safe but also makes finding everything a lot simpler when you’re setting up again.
This might feel like a bit of a faff, but trust me, it’s not a step to skip. A single broken glass shelf can be surprisingly expensive and a hassle to replace. For bigger moves, a set of proper security straps for easy transport can be a great investment for securing all sorts of bulky items, not just your fridge freezer.
Wrapping and Protecting the Exterior
With the inside empty and the doors firmly secured, it's time to give the outside some protection. The finish on a fridge freezer can get scratched or dented more easily than you’d think. Squeezing through tight doorways, navigating tricky corners, or sliding it into a van all present plenty of opportunities for damage.
This is where thick, padded moving blankets become your best friend. There's a reason the professionals use them. They create a cushioned layer that absorbs bumps and stops scratches in their tracks. Drape one blanket over the top and down the sides, then use another one or two to get full coverage, paying close attention to the corners—they're always the first to get knocked.
Make sure you cover the back of the appliance properly. This is where the cooling coils are often exposed, and they are incredibly fragile. Bending or puncturing one of these can cause a complete failure of the cooling system, which is an expensive fix.
When you're wrapping it, ensure the blankets cover the coils completely but aren't pulled so tight that they press against them. You're trying to shield them from impact, not crush them.
Once the blankets are positioned correctly, use packing tape or a good quality stretch wrap to hold everything in place. Go around the entire unit several times until you've created a snug, protective cocoon.
Lastly, don't forget the power cord. Letting it dangle is asking for trouble—it's a massive trip hazard and can easily get caught on something. Coil it up neatly and tape it securely to the back of the appliance, tucked safely inside the blankets. It’s a small detail that prevents accidents and protects the plug and cable from damage.
Lifting and Moving Your Appliance Safely
Once your fridge freezer is all prepped and wrapped, it's time for the heavy lifting. This part is less about brute force and more about using the right technique and equipment. Trying to wrestle a heavy, awkward appliance out the door is a fast track to scratched floors, dented walls, or even a serious back injury. Moving a fridge freezer is a two-person job, pure and simple, and it demands a bit of planning and a lot of communication.
The one piece of kit you absolutely need is a heavy-duty appliance dolly. This is not your standard hand truck. Appliance dollies are taller, more robust, and have built-in straps designed specifically for securing bulky items like a fridge. Using the proper tool makes all the difference, distributing the weight and giving you the control you need to get it out of the house safely.
Getting to Grips with an Appliance Dolly
First things first, slide the dolly’s base plate carefully under one side of the fridge. Your moving partner can help by gently tilting the appliance back just enough for the plate to slip underneath. Then, push the dolly so it's sitting flush against the side of the unit.
Now for the crucial part: securing it. Wrap the dolly’s straps around the main body of the fridge freezer and ratchet them down until they're completely taut. You want zero wiggle room here—the appliance and dolly should feel like a single, solid unit. Give it a gentle rock to make sure it’s stable before you even think about rolling.
The infographic below recaps the essential prep work that makes the lift itself possible. Getting this right turns a wobbly, risky item into a secure block.
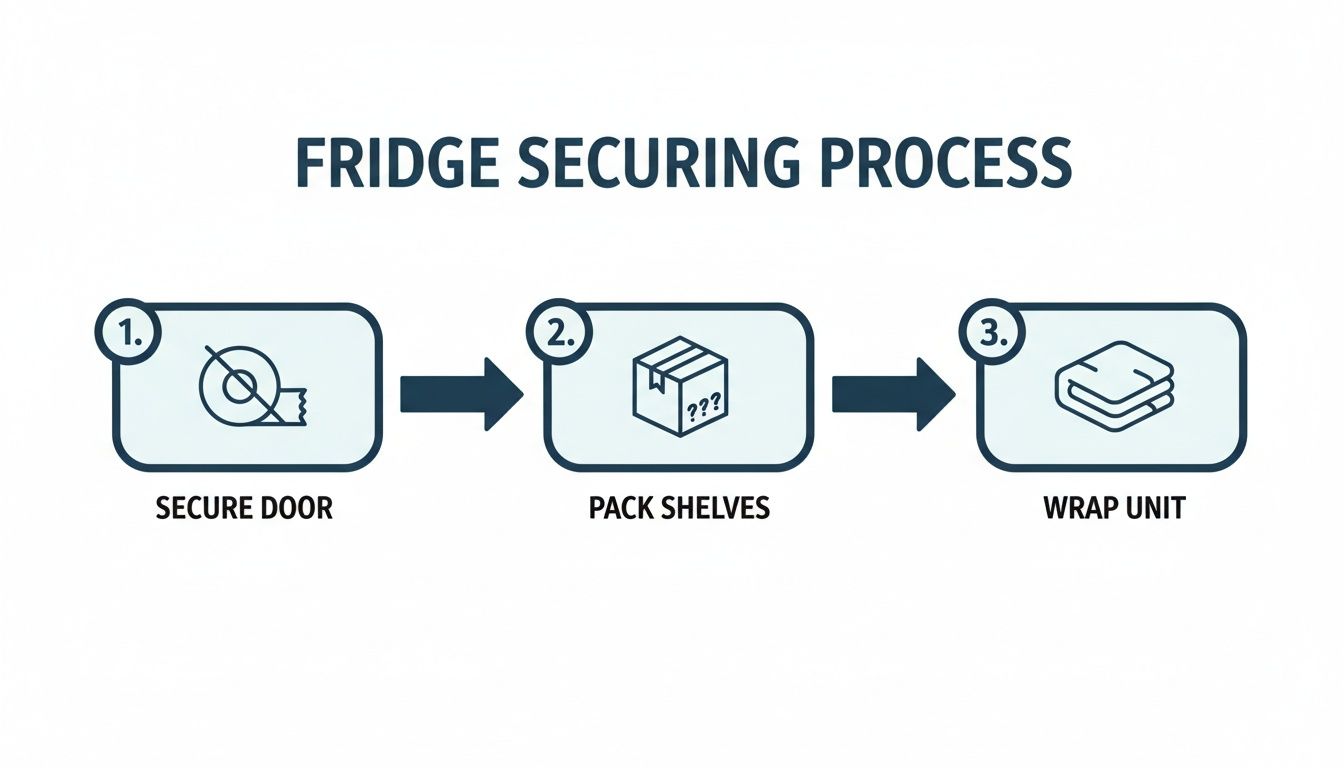
As you can see, securing the door, packing the internal bits, and wrapping the whole unit are the foundational steps for a safe move.
The Upright Rule: Why It’s Not Worth Ignoring
If you remember one thing, make it this: keep it upright at all times. It’s incredibly tempting to lay a fridge freezer flat to squeeze it through a low doorway or fit it in a car, but that simple mistake can kill it for good.
Here's why. The compressor has oil inside to lubricate all the moving parts. When you tilt the unit too far or lay it down, this oil can seep into the cooling pipes. If you plug it in before that oil has drained back where it belongs, it can create a blockage, burn out the compressor, and you're left with a very large, very useless metal box.
Always keep the appliance as vertical as you can. A slight tilt back onto the dolly—say, 15 to 20 degrees—is fine and necessary for moving. Anything more than that is playing with fire.
Tackling Tight Spaces and Stairs
Manoeuvring a beast like this needs a clear plan and great teamwork. Before you move an inch, walk the entire path from the kitchen to the van. Keep an eye out for potential hazards:
- Doorways: Are they wide enough? Sometimes, taking a door off its hinges is the only way to gain that crucial extra inch.
- Corners: Talk through how you'll pivot. One person needs to guide from the front while the other steers from behind.
- Stairs: This is where things get tricky. The person at the bottom becomes the guide and the brake, controlling the descent. The person at the top takes most of the weight. Go one step at a time and talk constantly. Don't ever let the dolly get away from you.
Clear, simple communication is everything. Stick to direct commands like "stop," "left a bit," "down one," and "mind the wall." The person walking backwards is putting their trust in the person facing forward to be their eyes. That coordination is what prevents accidents and gets the job done smoothly.
How to Transport Your Fridge Freezer the Right Way

You’ve done the hard part and got the appliance out of the house. Now for the journey. This is where a lot of easily avoidable damage happens. A moving van isn't a gentle ride; every turn, bump, and sudden stop puts your cargo under stress. The goal is to make sure your fridge freezer arrives in the same condition it left.
The golden rule we keep mentioning—keep it upright—is more important than ever during transport. I can't stress this enough. It's the single biggest factor in ensuring your appliance actually works when you get to your destination.
Positioning and Securing in the Vehicle
Once you’ve loaded the fridge freezer into the van, where you put it matters. The best spot is flush against a solid, flat surface, like the bulkhead right behind the driver's cab or one of the long side walls. This gives it a stable backdrop and seriously reduces the chances of it tipping over.
Whatever you do, don't just leave it freestanding in the middle of the van, even for a quick trip down the road. It will slide, and it will almost certainly fall. You need to secure it properly with heavy-duty ratchet straps. Forget about flimsy bungee cords; they simply won't do the job.
Wrap the straps around the main body of the appliance (over the blankets, of course) and anchor them tightly to the van's lashing points. You're aiming for a snug fit that eliminates any wobble, but don't go overboard and start cranking the ratchet so hard you dent the casing. The fridge should feel like it’s a part of the van itself. Having strong, reliable straps is non-negotiable for this.
Expert Tip: Position your fridge freezer upright against a solid wall inside the van. Use at least two high-quality ratchet straps to anchor it securely to the vehicle's lashing points, making sure it cannot slide, shift, or tip during transit.
The Risks of Transporting a Fridge on Its Side
Look, in a perfect world, you’d never lay a fridge freezer down. But sometimes, the height of your vehicle gives you no other choice. If you absolutely have to transport it horizontally, you need to be aware of the risks and how to minimise the potential for damage.
When a fridge is on its side, oil from the compressor can seep into the cooling lines. If you power it up before that oil drains back where it belongs, you can cause a permanent blockage and kill the compressor. To give yourself the best chance, you have to lay it on the correct side.
- Find the Compressor Lines: Take a look at the back of the fridge. You’ll see a network of tubes running from the compressor.
- Lay it on the Opposite Side: You want to lay the appliance down on the side opposite to where the main compressor lines connect. This positioning uses gravity to help keep the oil out of the delicate cooling system.
Most importantly, once you arrive, you must let the fridge stand upright for a good while before even thinking about plugging it in. A good rule of thumb is to wait at least as long as it was on its side, but honestly, a full 24 hours is the safest bet. This gives all the oil and coolant fluids plenty of time to settle back into place.
Getting this right is crucial for the appliance’s lifespan, which is a big deal when you consider its value. With the UK freezer market projected to bring in revenues of £239.60 million by 2025, these are expensive bits of kit worth protecting. If you need a complete walkthrough of the entire process, from defrosting to final placement, check out this expert guide on moving a fridge safely.
Choosing the Right Self-Storage for Your Appliance
If you're caught between moving dates or just need to tuck your fridge freezer away for a while, picking the right storage unit is crucial. It’s not just about finding an empty space; it's about making sure your appliance comes out in the same condition it went in. The wrong environment can lead to mildew, musty smells, or even damage to the cooling system.
With the UK market for household fridges and freezers growing by 4.2% each year, it’s clear a lot of people are upgrading or moving house. This constant churn means more and more of us are facing the challenge of what to do with these bulky appliances. For a deeper dive, you can read the full research on the expanding UK appliance market.
Why Drive-Up Access Is a Game-Changer
Let’s be honest, moving a fridge freezer is a heavy, awkward job. The last thing you need after all that effort is to arrive at the storage facility and have to navigate narrow corridors or wait for a lift. That’s just asking for a dropped appliance or a dented wall.
This is exactly why ground-level, drive-up units are such a lifesaver. At places like Admiral’s Yard, you can pull your van right up to your unit's door. It completely changes the game:
- Easy In, Easy Out: Move the appliance straight from your vehicle into storage. No long-distance carrying required.
- Less Risk of Damage: Fewer steps and less handling drastically cut down the chances of bumps and scrapes.
- Saves Time and Energy: You'll be loaded up and on your way in a fraction of the time.
Honestly, the convenience of a drive-up unit can't be overstated. It takes a huge amount of stress and physical strain out of the equation.
Selecting the Right Unit Size and Features
Finding the right size unit is a balancing act. You need enough room for the appliance to fit comfortably with space for air to circulate, but you don't want to waste money on a unit that's half empty. For most large fridge freezers, a 25-35 square foot unit (around 2.3-3.2 square metres) is the sweet spot.
Of course, size isn’t the only factor. Security is non-negotiable when you're storing a valuable appliance.
When selecting a storage facility, having a clear checklist of essential features can make all the difference. You want to ensure the environment is perfectly suited to protecting a large, sensitive appliance like a fridge freezer from both security threats and environmental damage.
Essential Storage Feature Checklist for Appliances
| Feature | Why It's Important for Fridge Freezers | Admiral's Yard Solution |
|---|---|---|
| Drive-Up Access | Minimises handling and risk of damage during loading and unloading. Makes a heavy, awkward job much easier. | Our ground-level units allow you to park directly at your door for straightforward access. |
| 24/7 CCTV | Provides constant surveillance, deterring theft and vandalism, and giving you a record of all activity. | We have comprehensive, round-the-clock CCTV monitoring across all our sites. |
| Perimeter Fencing & Gated Entry | Creates a secure boundary, ensuring only authorised people can access the facility. | Our facilities are enclosed by robust security fencing and managed with electronic gate access. |
| Appropriate Unit Size | Ensures proper air circulation around the appliance to prevent moisture build-up and musty odours. | We offer a range of unit sizes, including the ideal 25-35 sq ft for most fridge freezers. |
This checklist gives you a solid foundation for choosing a facility that will keep your appliance safe and in perfect working order until you need it again.
Key Takeaway: A secure facility isn't a luxury; it's a necessity. Always look for 24/7 monitored CCTV, strong perimeter fencing, and controlled electronic gate access. Your peace of mind is worth it.
If you're looking for more general advice on what to look for, this complete self-storage options handbook is a great resource for storing all kinds of household goods.
Essential In-Storage Care for Your Fridge Freezer
Once your appliance is safely in the unit, there are a couple of small but vital things left to do. These final touches are what will prevent the dreaded stale odours and mildew that can ruin an improperly stored fridge.
First and most importantly: leave the door slightly ajar. I can't stress this enough. Wedge it open with a small block of wood or a doorstop to keep air flowing. A sealed-up fridge is the perfect breeding ground for moisture and unpleasant smells.
As a final touch, popping a box of bicarbonate of soda or a moisture-absorbing pack inside will help keep everything fresh. To protect it from dust, you can also drape a breathable cover over the top. Something like our Jumbo XXL waterproof pallet covers is ideal for shielding your appliance, ensuring it's spotless and ready to use when you retrieve it.
Got a Few Questions About Moving Your Fridge Freezer?
Even with the best-laid plans, a few last-minute questions always seem to pop up when moving a fridge freezer. It’s more than just a heavy box, and it’s completely normal to feel a bit unsure about the technical details. Nailing these final points is just as crucial as the big lift itself.
We’ve heard all the common queries over the years. From how long to wait before plugging it in to whether you can really lay it down in the van, getting the right answers gives you the confidence for a smooth, damage-free move. Let's clear up some of that confusion.
How Long Do I Have to Wait Before Plugging My Fridge Back In?
This is the big one, and the answer comes down to one thing: how you moved it. That waiting period is vital for letting the compressor oil and coolant settle back where they belong. Firing it up too soon is a fast track to a broken fridge.
Here's the rule of thumb I always share:
- If you kept it upright: You’re in luck. As long as the fridge freezer stood tall for the whole trip, you only need to give it 2 to 4 hours. This just allows everything to settle after the bumps and vibrations of the road.
- If it was tilted or laid on its side: Patience is your best friend. If you had no choice but to transport it horizontally, leave it standing unplugged for at least 24 hours. This ensures any oil that snuck into the cooling lines has plenty of time to drain back to the compressor.
Plugging a fridge in too soon after it’s been on its side is the number one reason they fail after a move. Trust me, it’s a gamble that isn’t worth taking—a bit of patience can save you hundreds of pounds.
Can I Actually Transport My Fridge Freezer on Its Side?
Honestly? You should do everything you can to avoid it. The golden rule is to keep fridge freezers upright at all times. It’s the only way to guarantee the delicate internal parts are protected and the compressor oil stays put.
But look, sometimes real life gets in the way. Maybe the van just isn’t tall enough. If laying it down is your only option, you need a damage-limitation strategy. Find the compressor lines at the back of the unit, and then lay it down on the opposite side. This simple trick uses gravity to help keep the oil away from the delicate cooling system. And when you get to your destination, that 24-hour waiting period becomes absolutely non-negotiable.
Is Defrosting My Fridge Freezer Really That Important?
Yes, one hundred per cent. Skipping the defrost is a recipe for a soggy, messy disaster. As soon as that unplugged freezer starts to warm up in the van, any ice will begin to melt.
This creates a whole host of problems:
- Water Damage: That meltwater has to go somewhere. It will soak your moving blankets, pool on the van floor, and seep into any cardboard boxes nearby.
- Safety Hazard: A puddle of water makes for an incredibly slippery and dangerous surface, both for the people carrying the appliance and for anyone else working in the area.
- Appliance Damage: Water and electricity don't mix. It can easily get into the fridge's own electrical components and cause a short circuit or lasting damage.
Make sure you start the defrost 24 to 48 hours before moving day. It’s a non-negotiable step for a clean and safe move.
What's the Best Way to Clean a Fridge Before a Move?
A good clean is essential, particularly if the appliance is heading into a storage unit for a while. You don't need fancy chemicals; a simple solution of bicarbonate of soda and warm water works wonders. It’s a fantastic natural cleaner and deodoriser that won’t leave a chemical smell behind.
Give every surface a wipe-down—the shelves, the drawers, and especially the rubber door seals. The most important part? Make sure the inside is bone dry before you tape the doors shut for transport. This is your best defence against mould and mildew, which can take hold surprisingly quickly in a sealed, dark space.
Should I Just Hire Professionals to Move My Fridge Freezer?
While you can certainly move a fridge freezer yourself with the right gear and a few friends, calling in the professionals is often the smarter, safer bet. They do this day in and day out. They have the proper stair-climbing dolly, the experience, and the muscle to handle bulky items without damaging your home or themselves.
Think about hiring professionals if:
- Your move involves any stairs, up or down.
- You're dealing with narrow hallways or tight corners.
- You don’t have access to a van that’s tall enough for upright transport.
- You’re worried about the risk of injury or damaging your property.
When you weigh it up, the cost of hiring movers is often far less than the bill for a new appliance or a visit to the physiotherapist. It just gives you that crucial peace of mind.
No matter the scale of your move, having a secure place to store your belongings can make all the difference. At Admiral's Yard Self Storage, we provide clean, secure, and easily accessible drive-up units perfect for large appliances like fridge freezers. Find your ideal storage solution with us today.